Hume process: client cases
The HUME process consists of several main steps. For optimal results, we combine the initiative and dedication from the care teams and the expertise from Mentech.
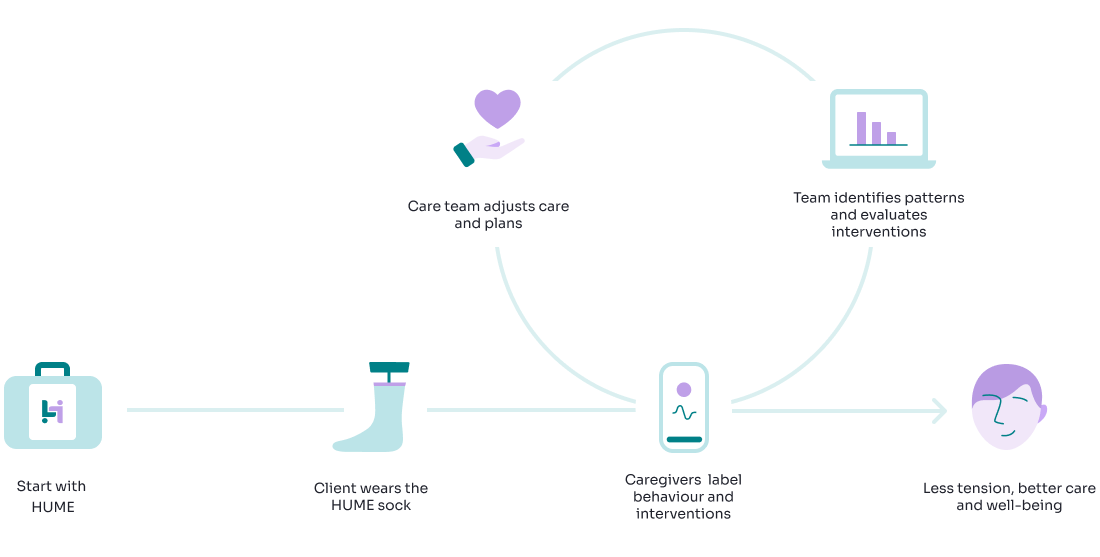
Step 1: Start with HUME
We deliver the HUME kits to you. Your HUME kit includes:
HUME socks patch for the client
Hub phone, pre-configured by our experts for accurate measurements
Senti module to connect the socks and the hub phone
Conductive gel for improved contact between the socks and the client’s skin
Chargers for the hub phone and Senti module
Washing bag for the socks
Carry bag for the hub phone
Quick start guide
Our consultants from Mentech make sure you are well supported from the very beginning. We offer training and presentations on how to use our tools.
Step 2: Base measurement with HUME
For the first period (~ 2 weeks), we advise a baseline measurement. It is done for exploratory purposes to learn what the average day or week of a client looks like.
It is important that the client wears the HUME sock properly and regularly the HUME sock to avoid gaps in the data.
Step 3: Communicate properly the HUME strategy with the care team
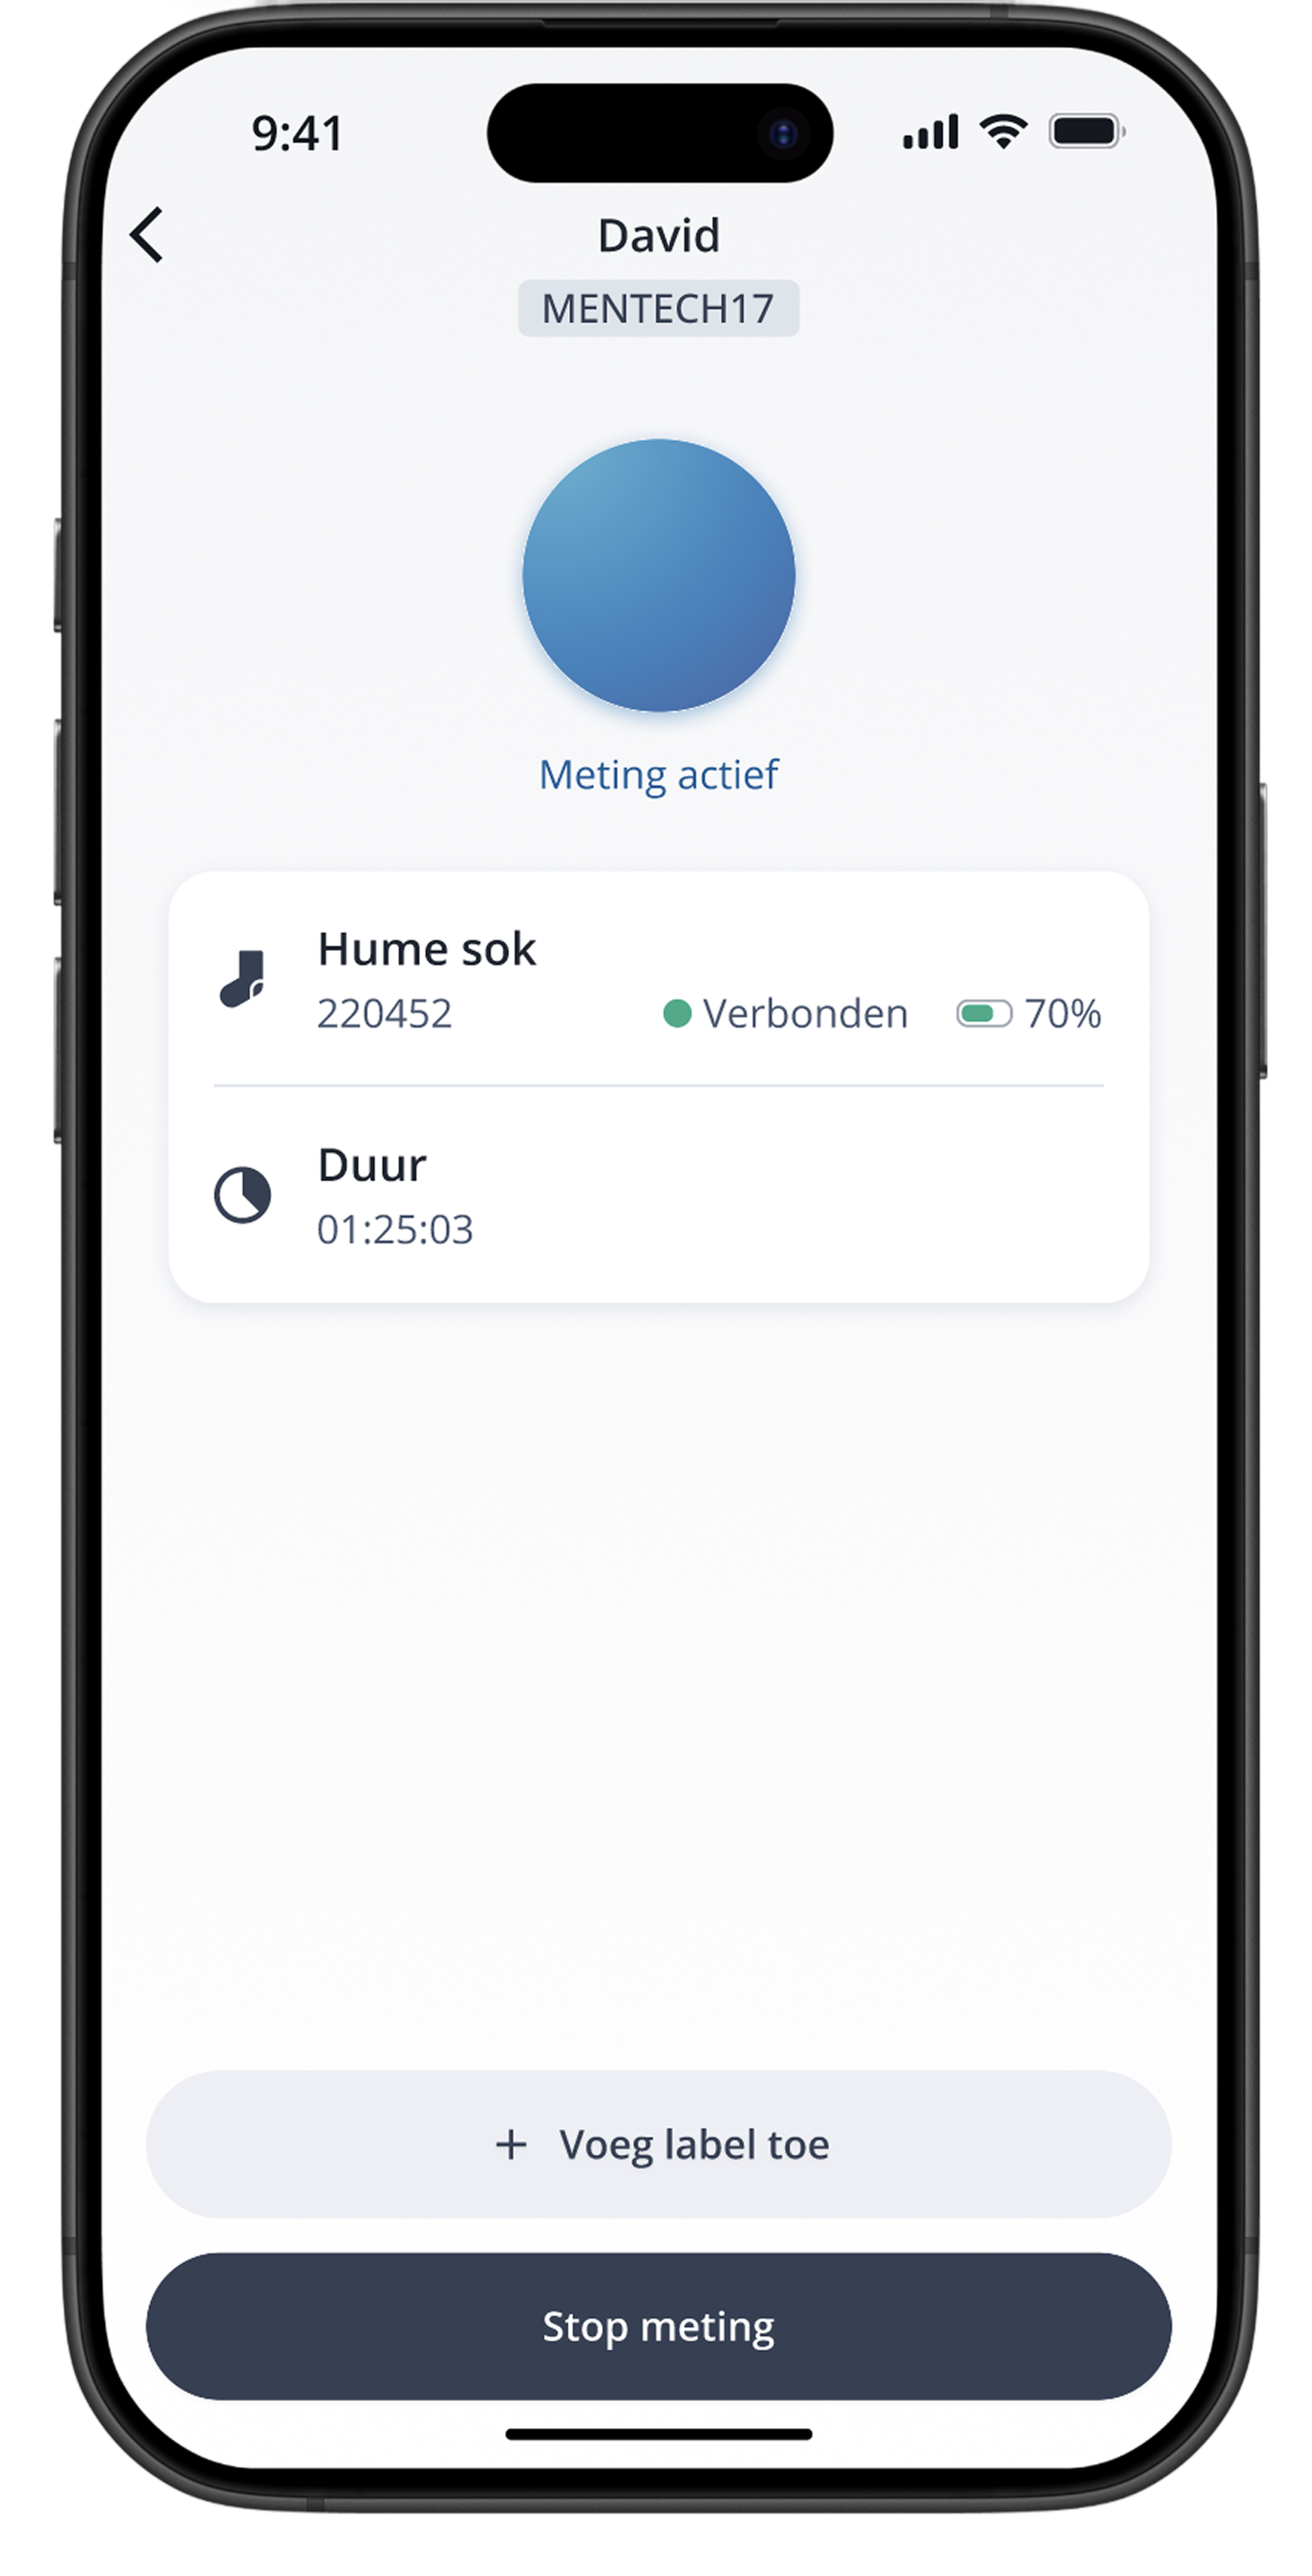
The key to a successful HUME case is a well-informed and dedicated caregiver. In other words, caregivers must start and stop the measurements daily and put labels with the HUME app.
The caregivers need to know when to start and stop those measurements- a default time is from 8:00 to 20:00, but the process should be adapted to the client’s needs and schedule.
Mentech also provides training for the caregivers.
Step 4: Periodic Evaluations
The duration of each HUME case is different depending on your research question. It is recommended to do a deep data analysis (with MyHume) to track your progress and adjust interventions and activities accordingly and in a timely manner.
A common pattern in a HUME case:
Evaluation 1 (2 weeks or more after the start):
Use the average stress levels chart to analyse the day of your client. Look for stress peaks and more relaxed moments. Link those times to the schedule of your client and determine which activities cause more stress than others.
Make a strategy about new interventions or behaviours you want to further analyse. Create predefined labels for those moments to ease your caregivers.
👉 Create a report with Reporting tool about your findings and save it in the Electronic Client Portal. In this way, you make every next evaluation easier for yourself and your team.
Evaluation 2,3,4… (4 weeks -6 weeks after previous one):
You can request an evaluation sooner with a Mentech consultant if you need it. Together, we make a plan based on your needs.
Compare period 1 to period 2 to determine if your overall strategy has improved.
Analyse the labels to determine which moments in particular reduce (or increase) the stress in your clients.
Adjust your strategy and research goals accordingly. Create new predefined labels if necessary.
👉 Create a report with Reporting tool about your findings and save it in the Electronic Client Portal.
🔁 Repeat this process until you reach the desired improvement in your client.
Involve the team in your evaluations. Discuss whether what you see in the MyHume charts is recognisable also on the working floor.
Using the Early Warning system in the HUME app
What is an early warning system?
The HUME app user can see at every moment of a measurement what the stress status of the client - 🟢 relaxed, 🟡 alert or 🔴 stressed. This can be very useful to prevent escalations by stepping in on time and helping the client in hard situations. There is also a stress history up to 1 hour back.

However, some of our customers prefer to focus only on long-term diagnostics and do not allow the caregivers (and/or the clients) to see what is the current stress status predicted by HUME. In these situations, the HUME app shows only if the measurements is running smoothly( 🔵 measurement active) or there is an error.
How to set this up from MyHume?
You can enable and disable the traffic light stress prediction for each client separately.
1. | Open the client profile which you want to adjust. Click the settings icon in the upper left card. 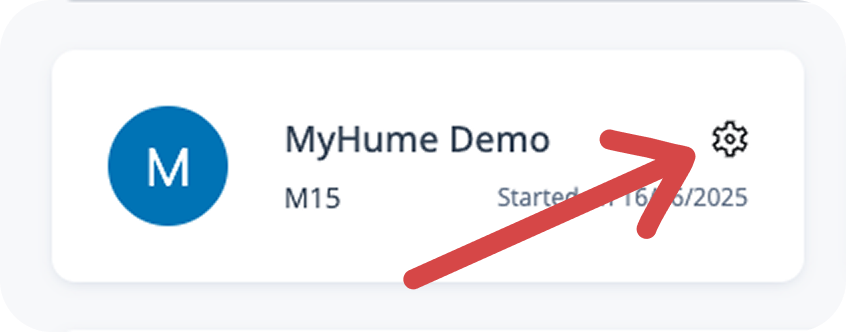 |
2. | In the General settings, you have the possible 3 options: |
2.1 | Option 1: Choose “Clients and caregivers“ if you want to show the traffic light stress predictions in real time to both the group and the hub phone. In this way, everyone will be able to see them. 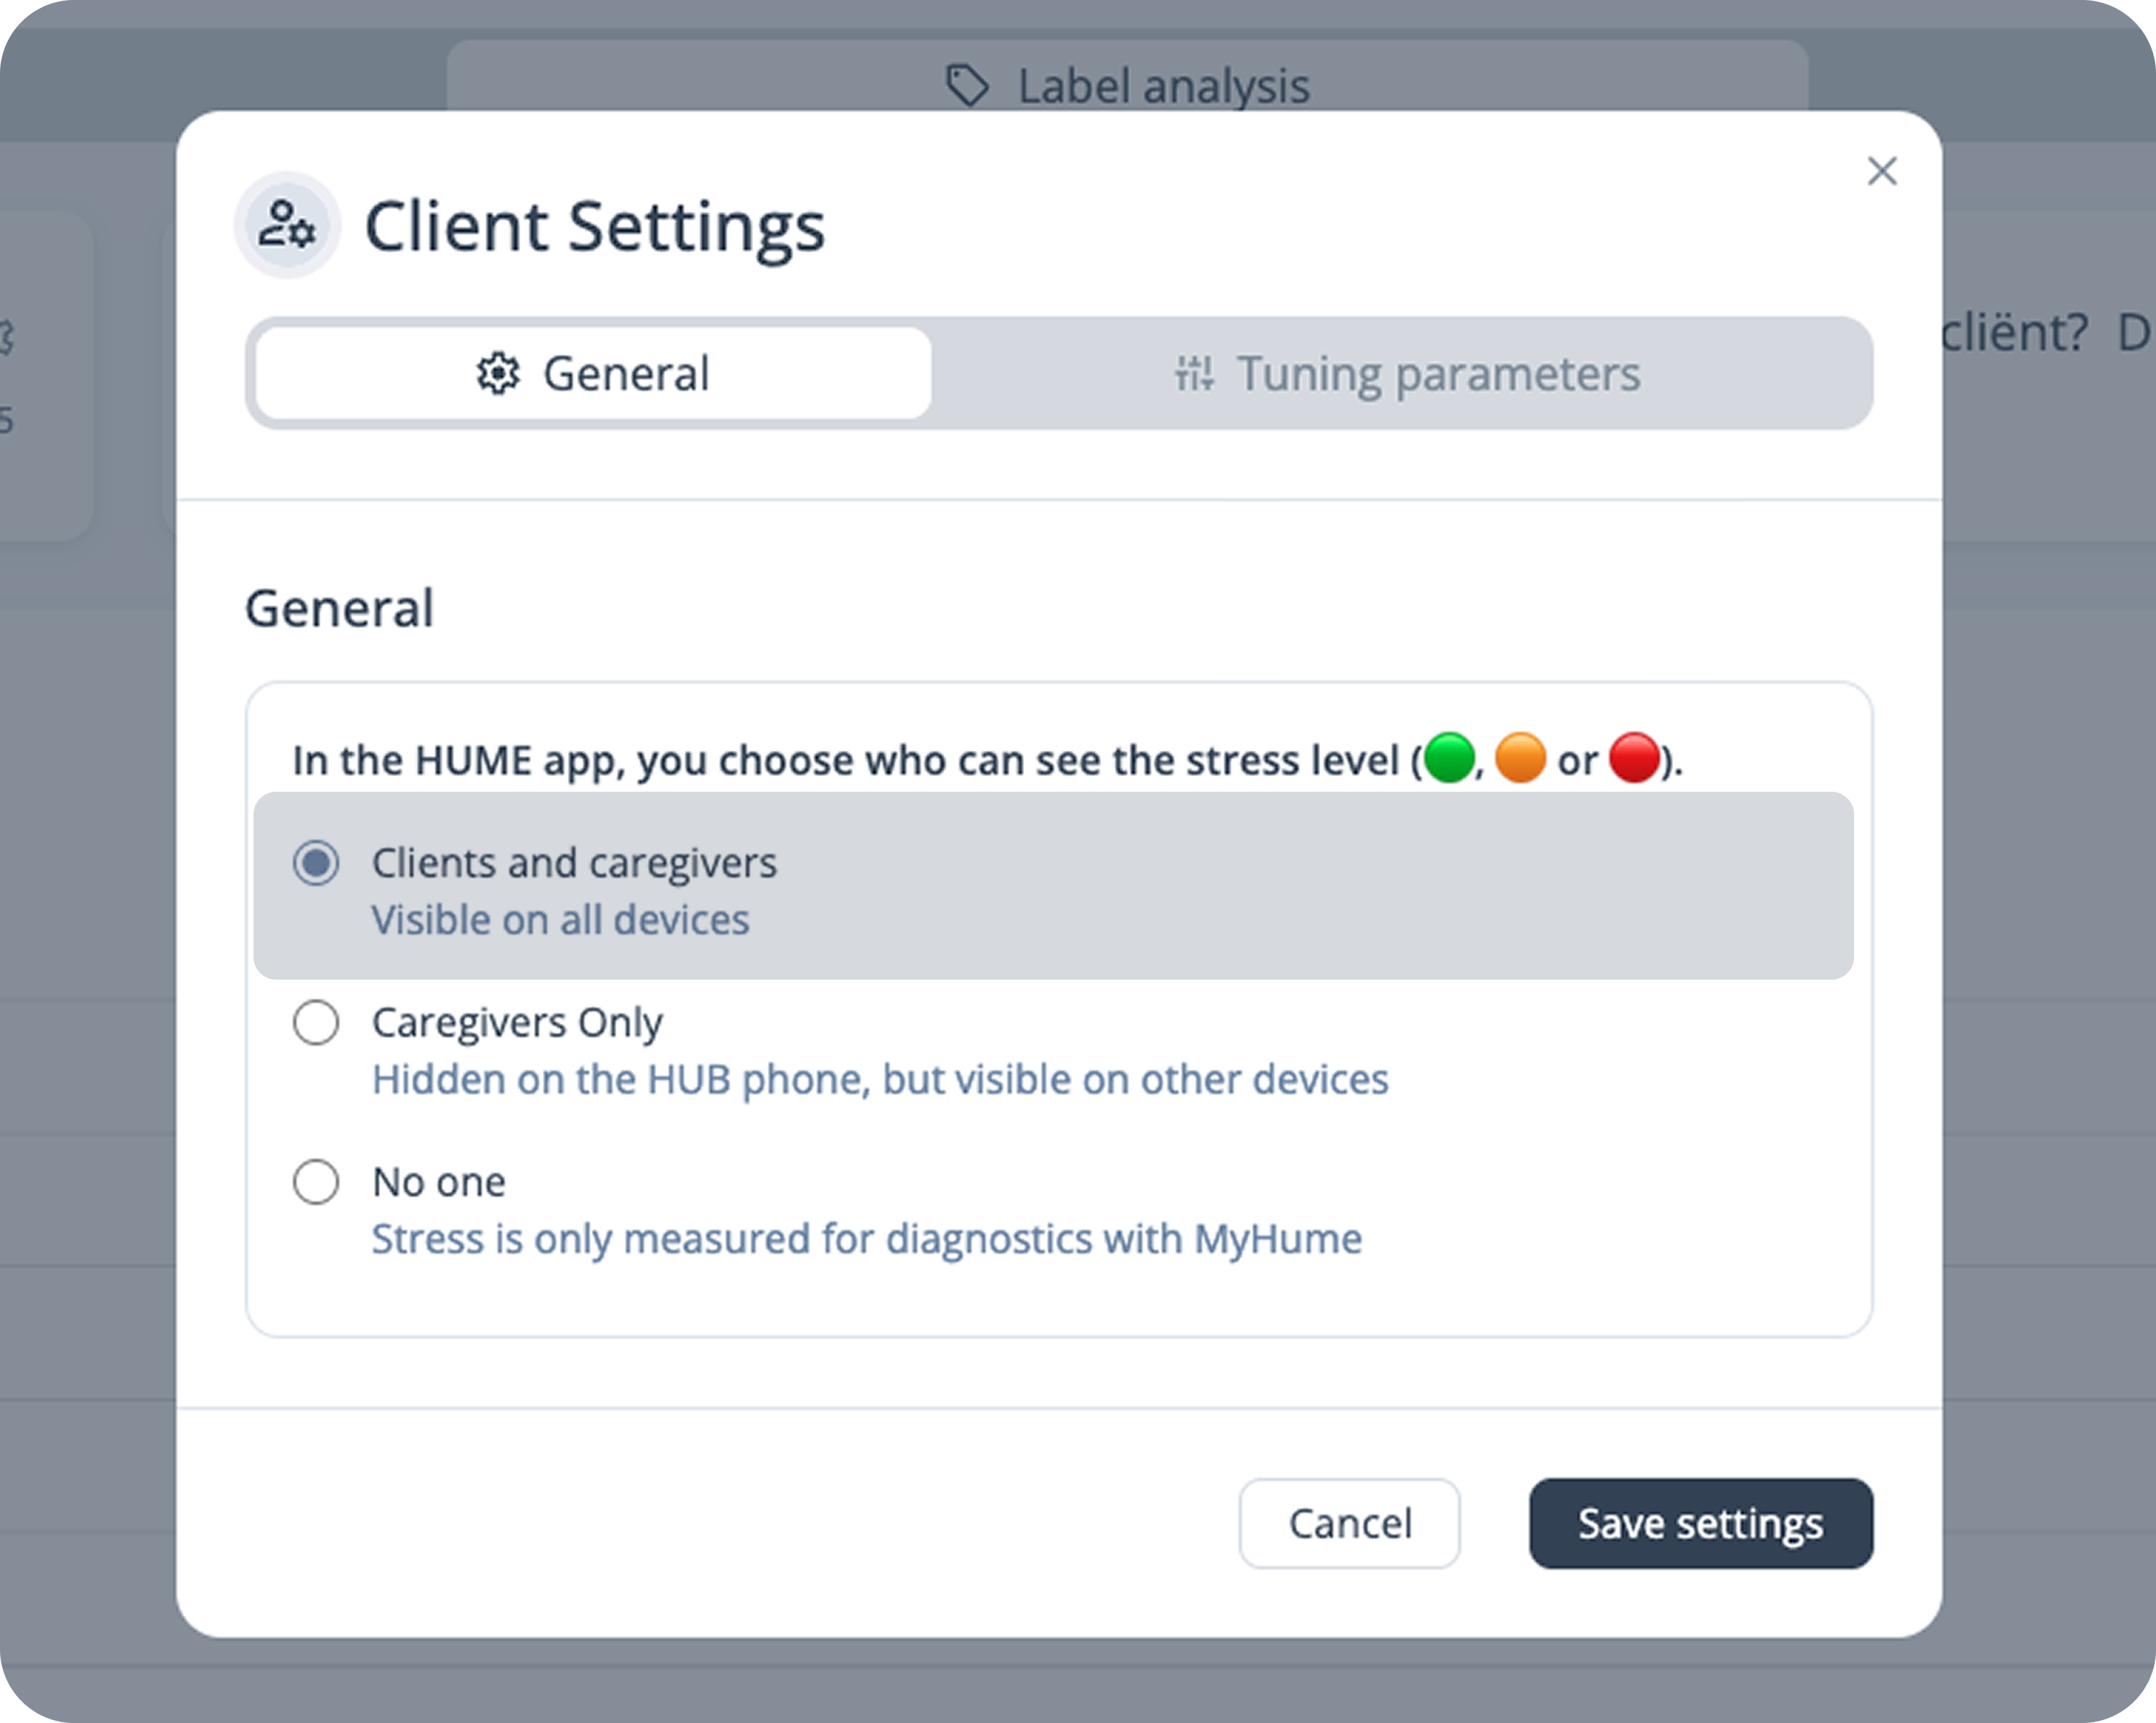 |
2.2. | Option 2: Choose “Caregivers only“ if you want to show the traffic light stress predictions in real time only to the group phone. This means that the hub phone (used to start the measurement) will not display the live stress predictions. This is preferred when you do not want your client to see his own data (stress predictions and labels). 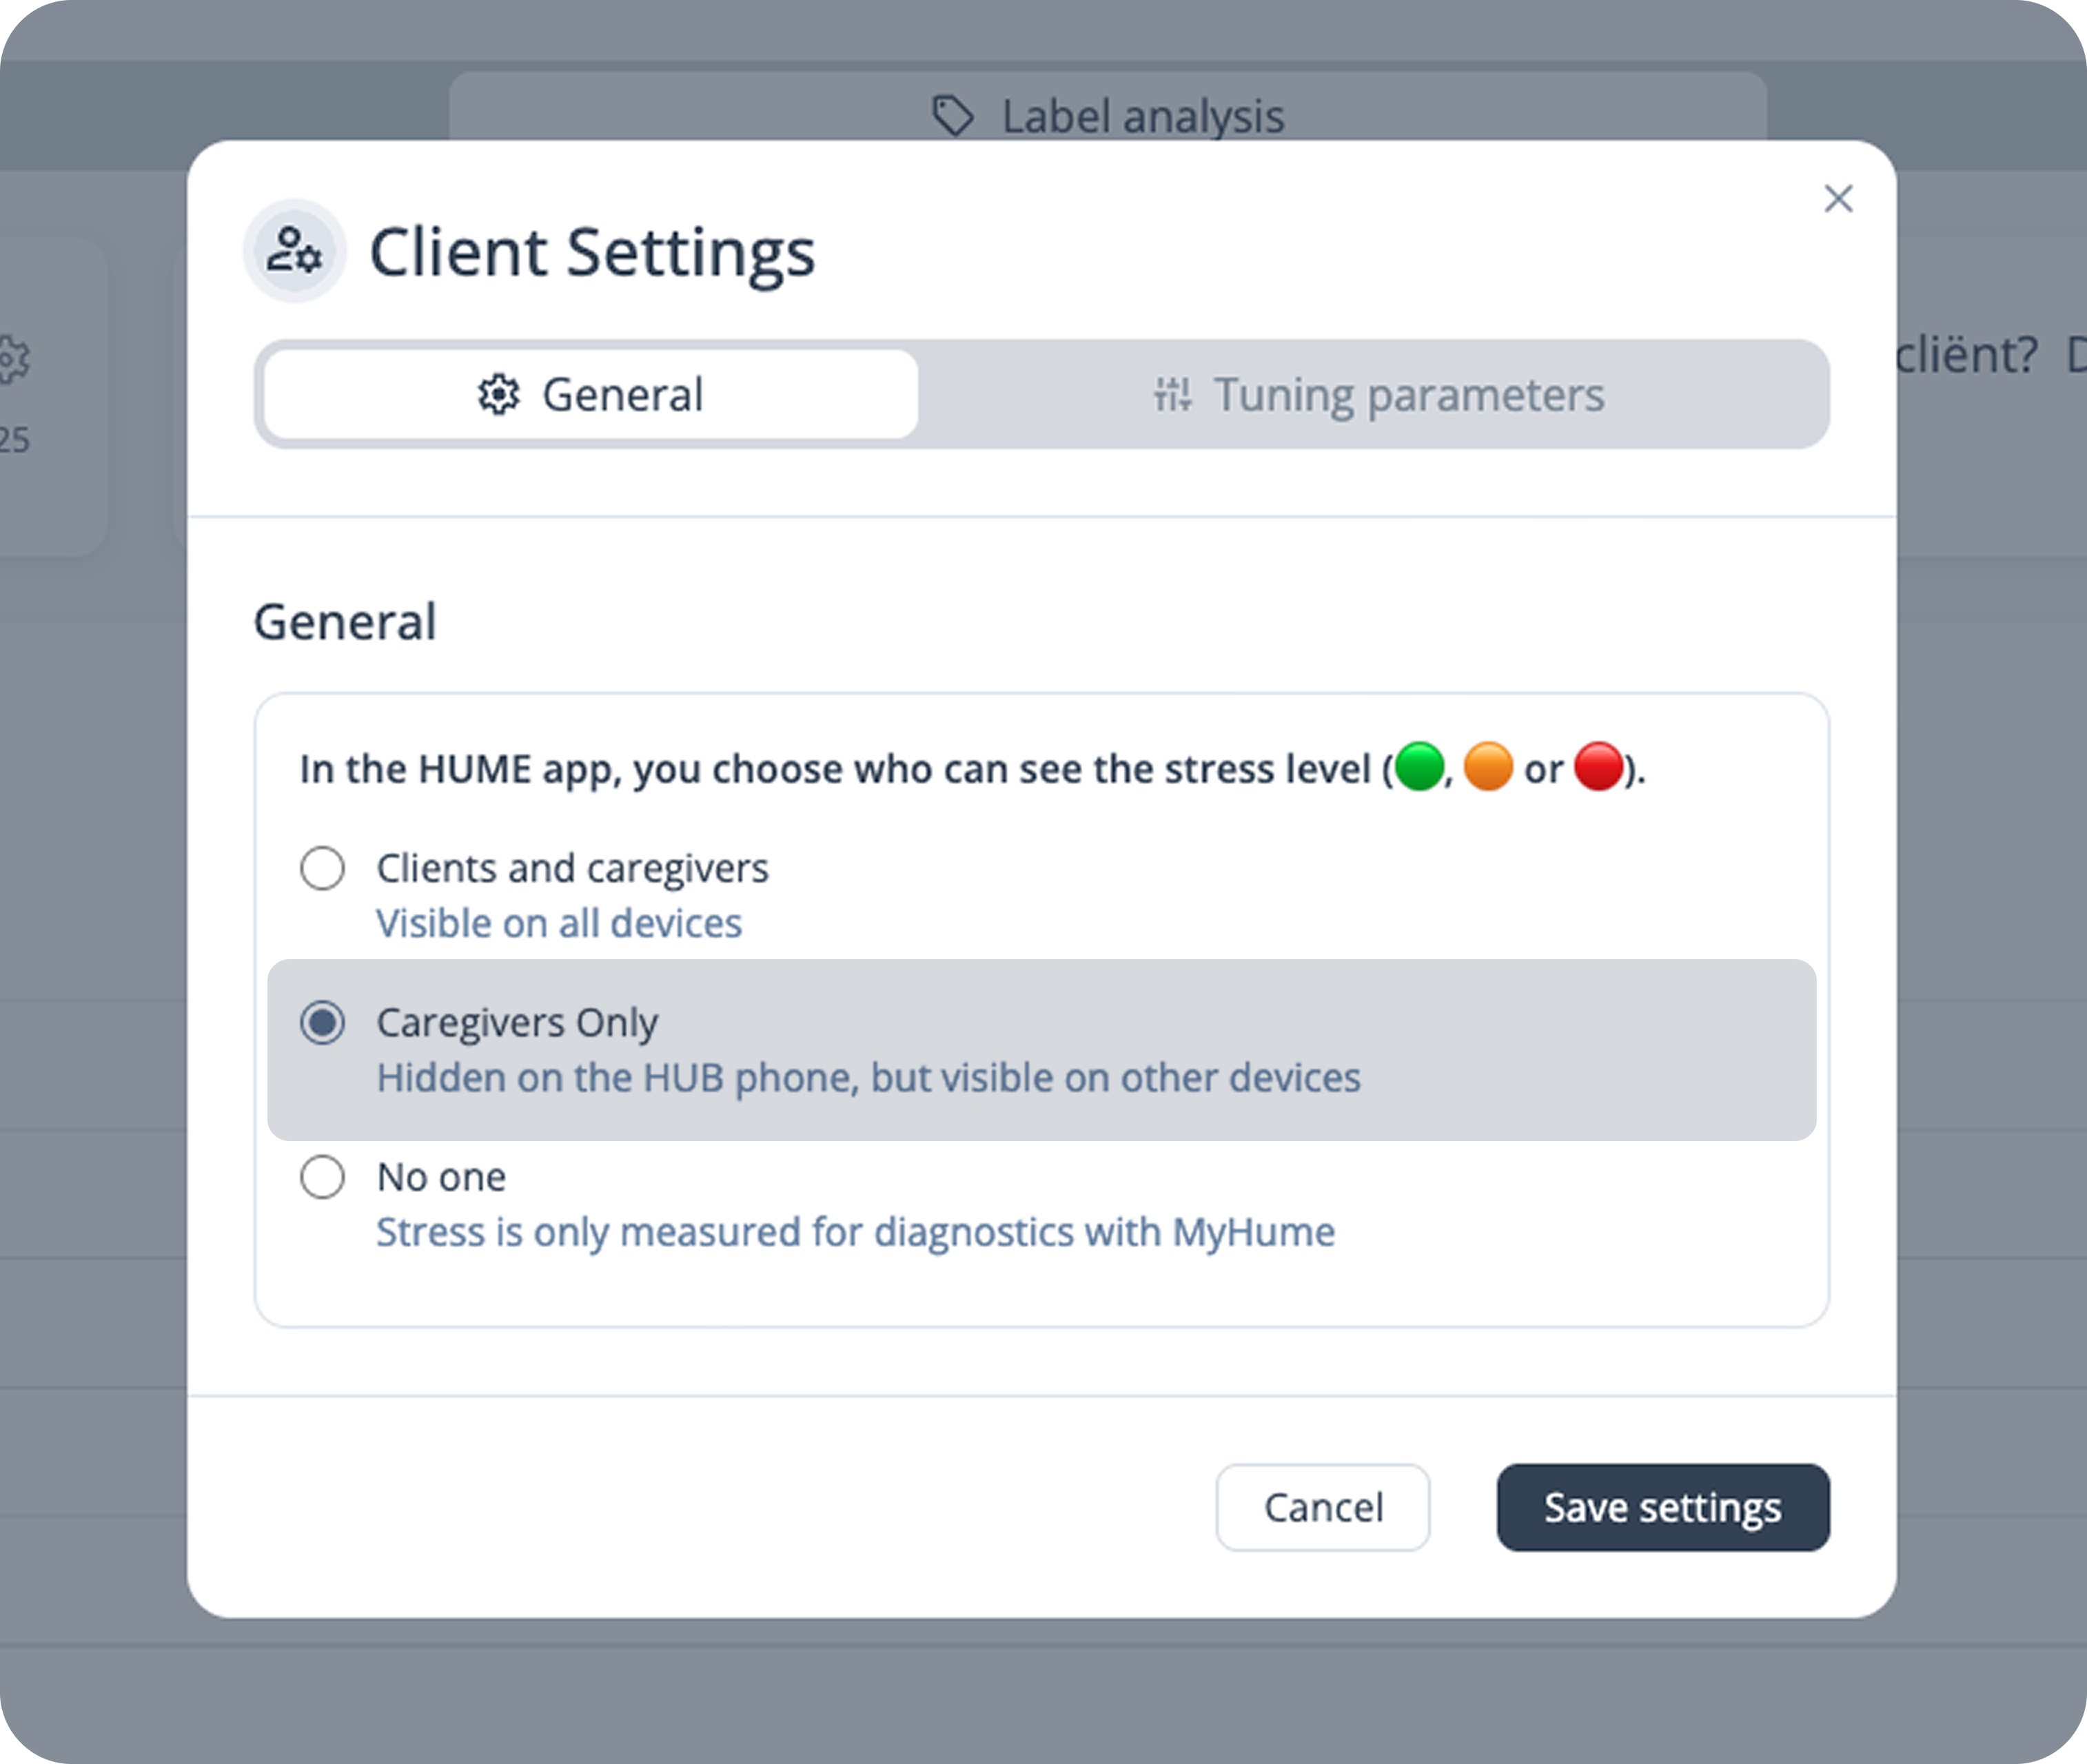 |
2.3 | Option 3: Choose “No one“ if you do not want any of the HUME app users to see the live stress predictions incl. clients and caregivers. This is preferred when you do not want the live data to influence your workflow and you collect data only for long-term diagnostics. 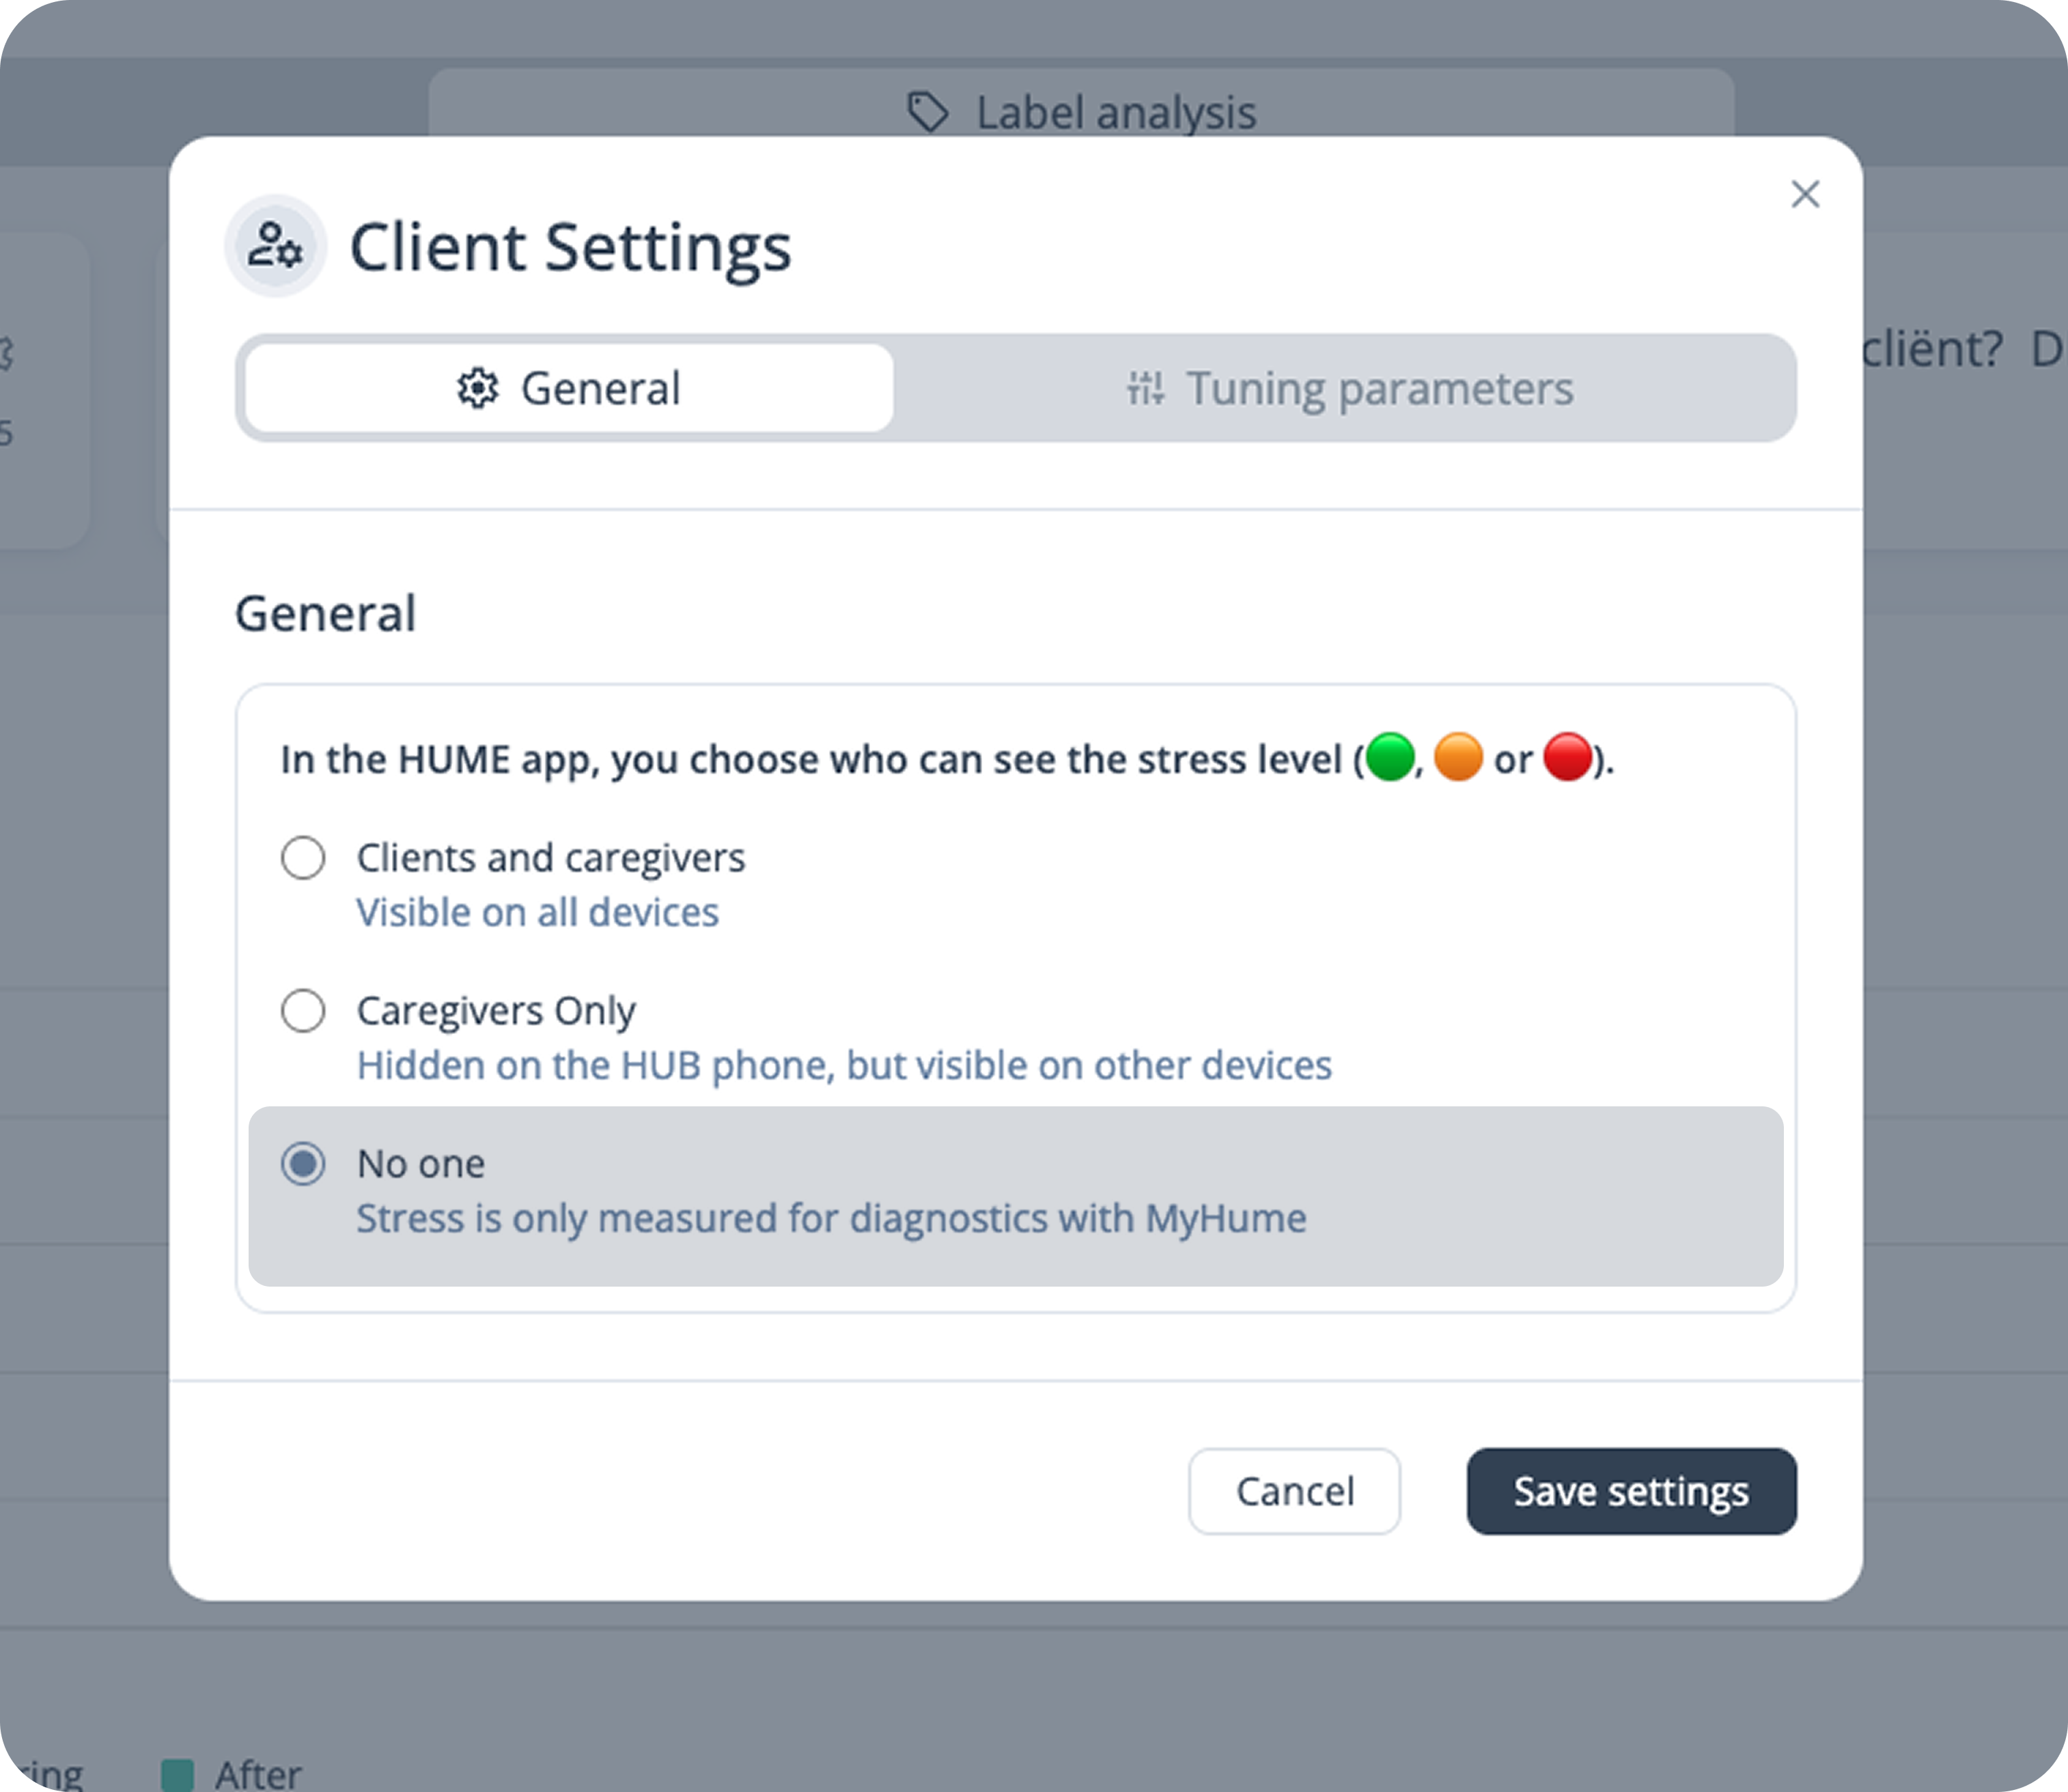 |
3. | Click “Save settings“ to publish your changes. |