Measurements- before, during and after
Preparing the Measurement
Make sure that you:
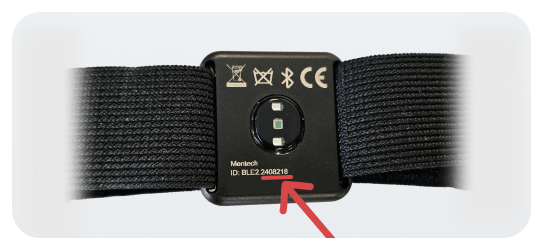
have charged the Senti-module 🔋
have charged the Hub phone 📱
have enabled Bluetooth and 📌 Location on the phone
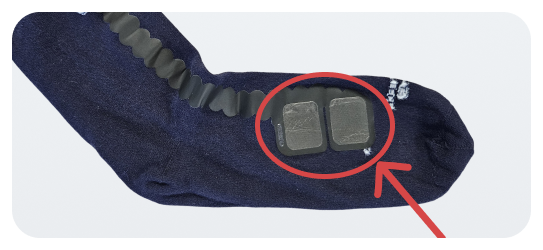 |
Make sure the sock is straight, and the white pads are properly in contact with the skin.  |
 |
 |
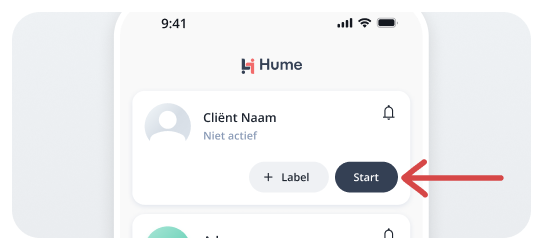
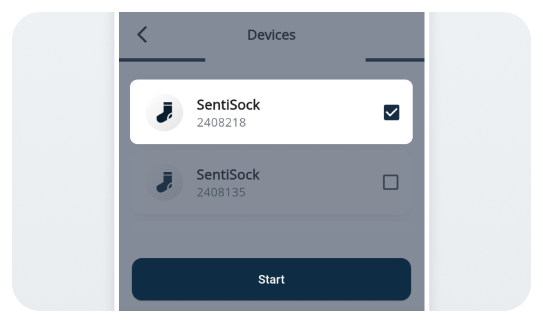
Starting the Measurement
Check if the LED light on the Senti-module is blinking blue.
 |
 |
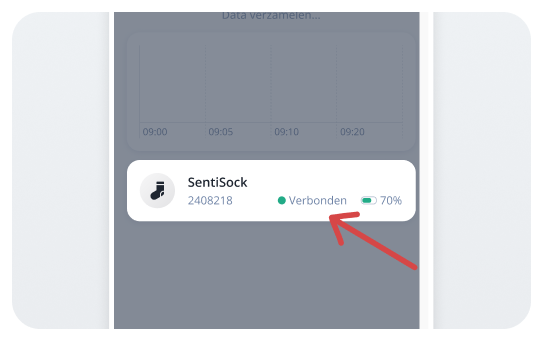 |
It may take 40–60 seconds before HUME has collected enough data to display the stress status. 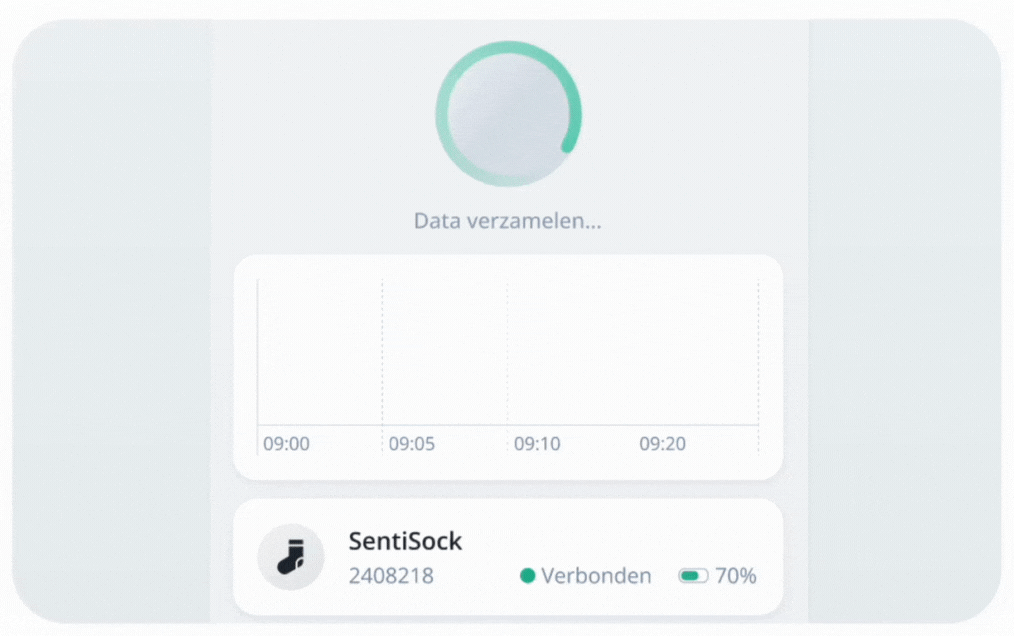 |
You can then lock the HUME phone and place it in the waist pouch with the client. 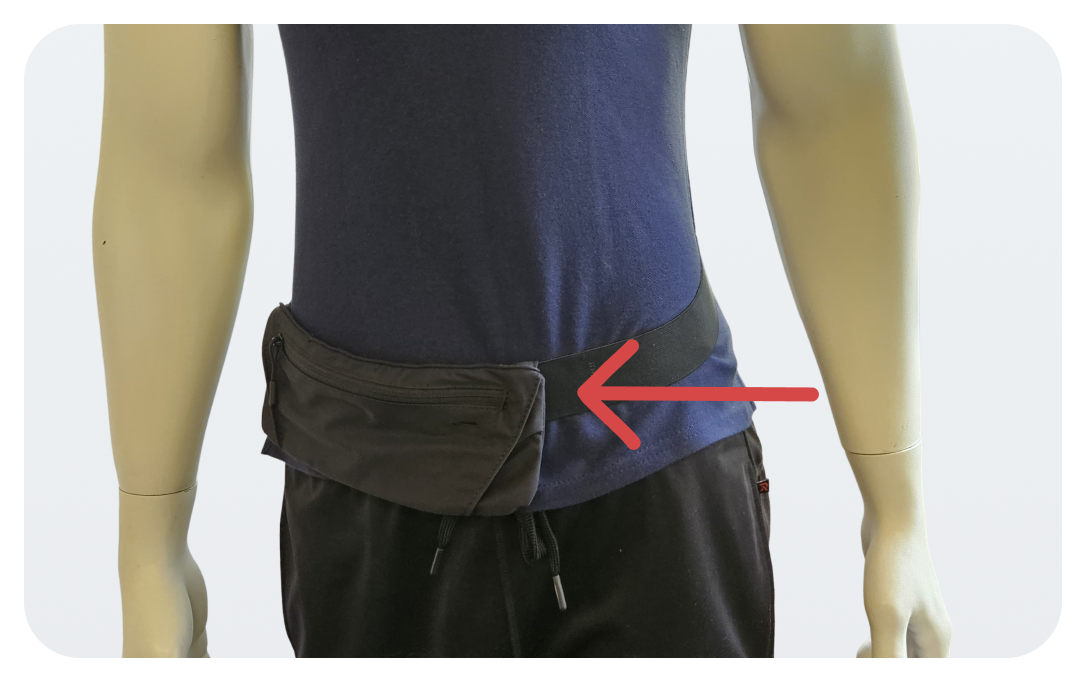 |
Following the Measurement
Keep the Hub phone within 5 meters of the client during a measurement, without a wall in between. You can follow the measurement from multiple phones: download the HUME app and log in.
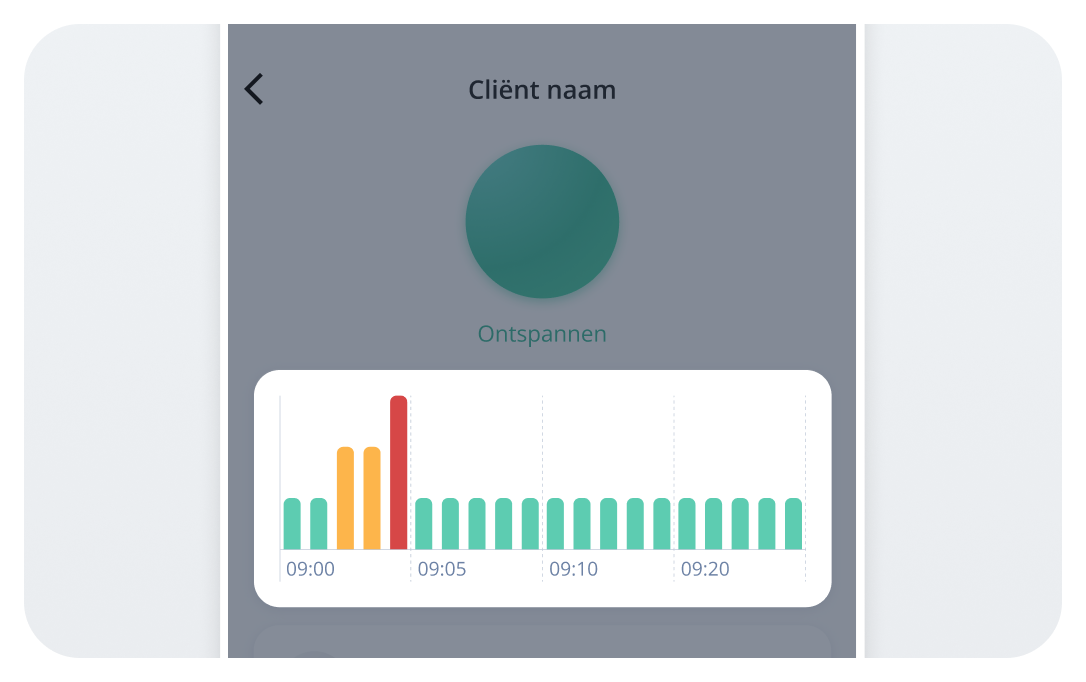
In the stress overview, you can see the stress status of your clients. A round dot indicates that HUME is actively measuring that client.
Status | Description |
|---|---|
Green 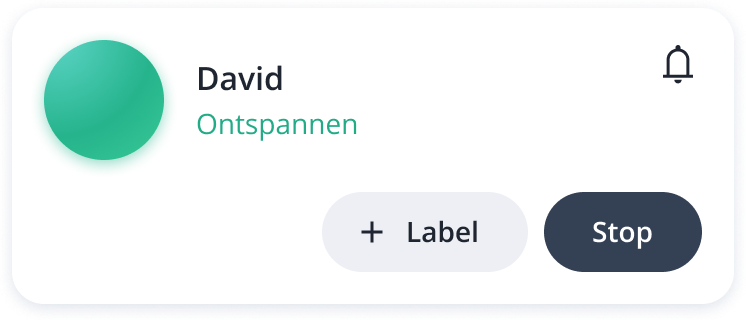 | Client is relaxed. |
Orange 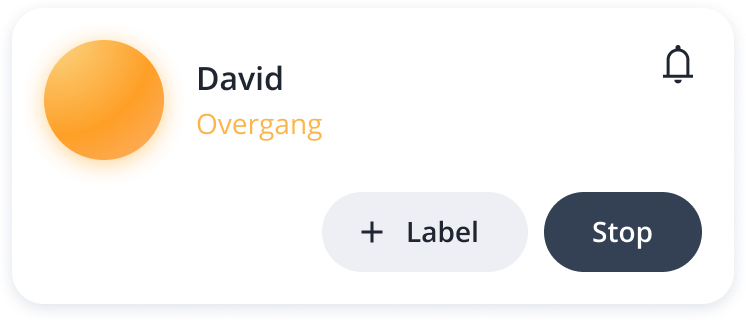 | Transition between relaxed and tense. |
Red 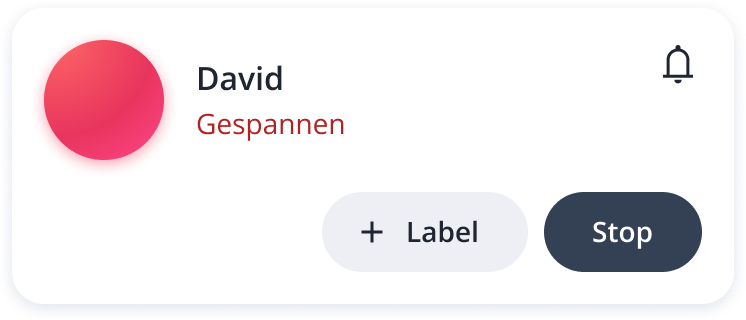 | Client is tense. |
Blue 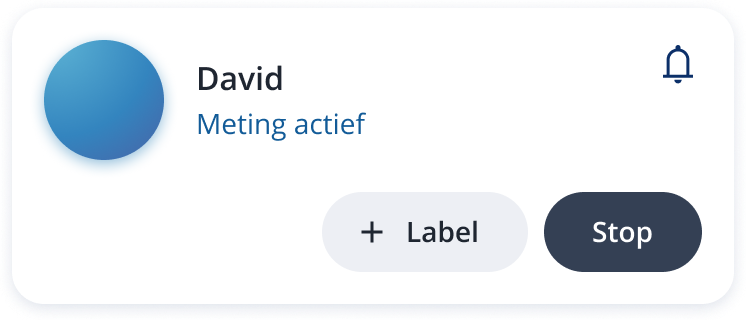 | Measurement is running smoothly (Stress predictions disabled by behavioural specialist) |
Grey (with or without an exclamation mark) 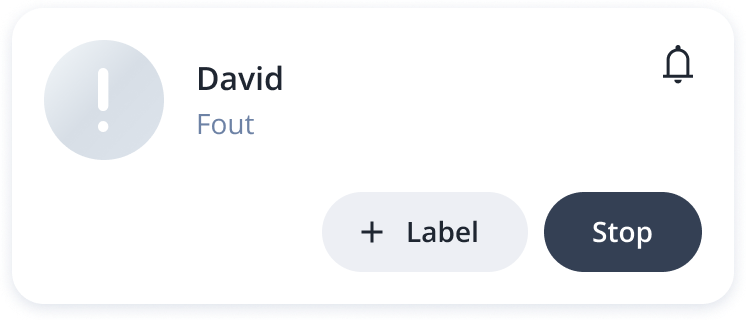 | (Still) no or insufficient data, or an error. |
Cloud with line 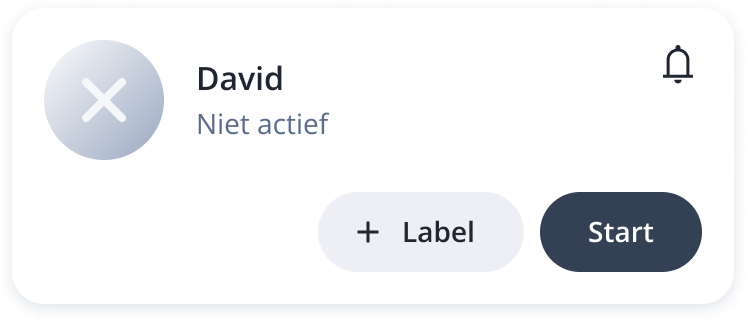 | HUME is not on. |
Stress gauge 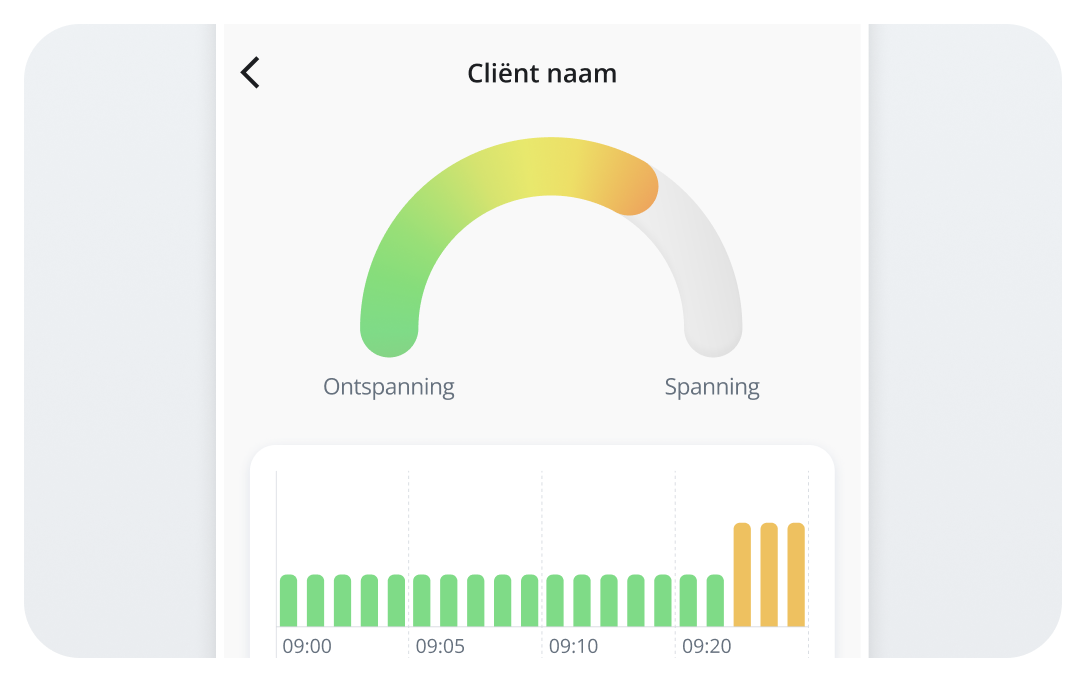 | *To view the stress gauge, click on the large colored circle with the stress status. |
|
The stress history in the HUME app can be disabled by the behavioural specialist. Stress History |
The stress history appears under the round dot. You can navigate through the graph by swiping left or right with your finger. The stress history is available up to 1 hour back (not for the entire measurement). |
 |
Use labels to mark important moments and interventions from the client’s day.
Labels: | |
1 | Click on ‘Add label’. 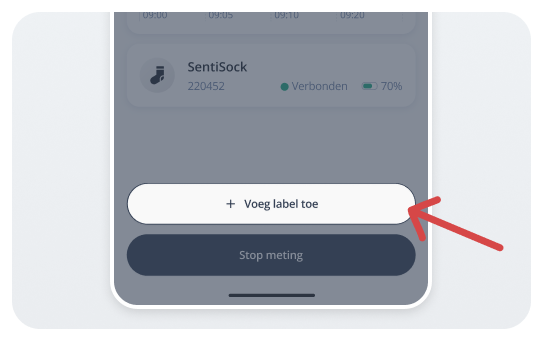 |
2 | Choose the date, start time, and end time. You can also use the quick-select options of 1, 5, 15, 30, or 60 minutes. Make sure the set time corresponds with the actual duration of the activity, behaviour, transition, etc. 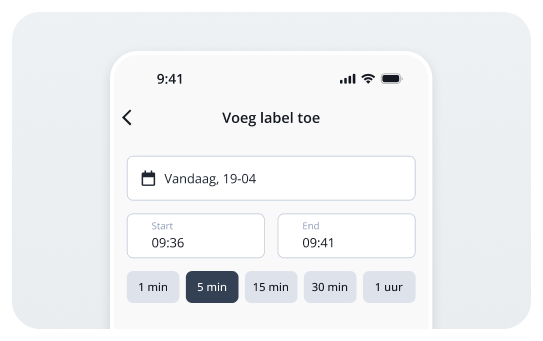 |
3.1 | Option 1: Tap a label in the list to select it. You can optionally add an extra description. 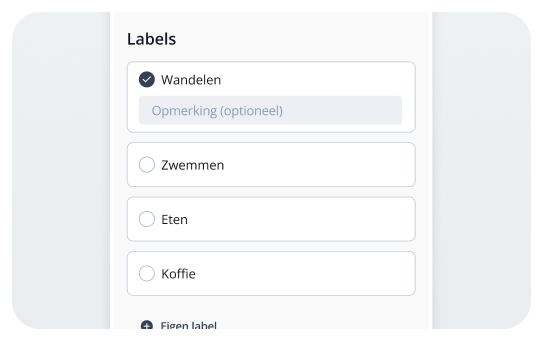 |
3.2 | Option 2: Do you want to label a moment that is not in the list? Tap ‘+ Custom label’ and add your own text label. 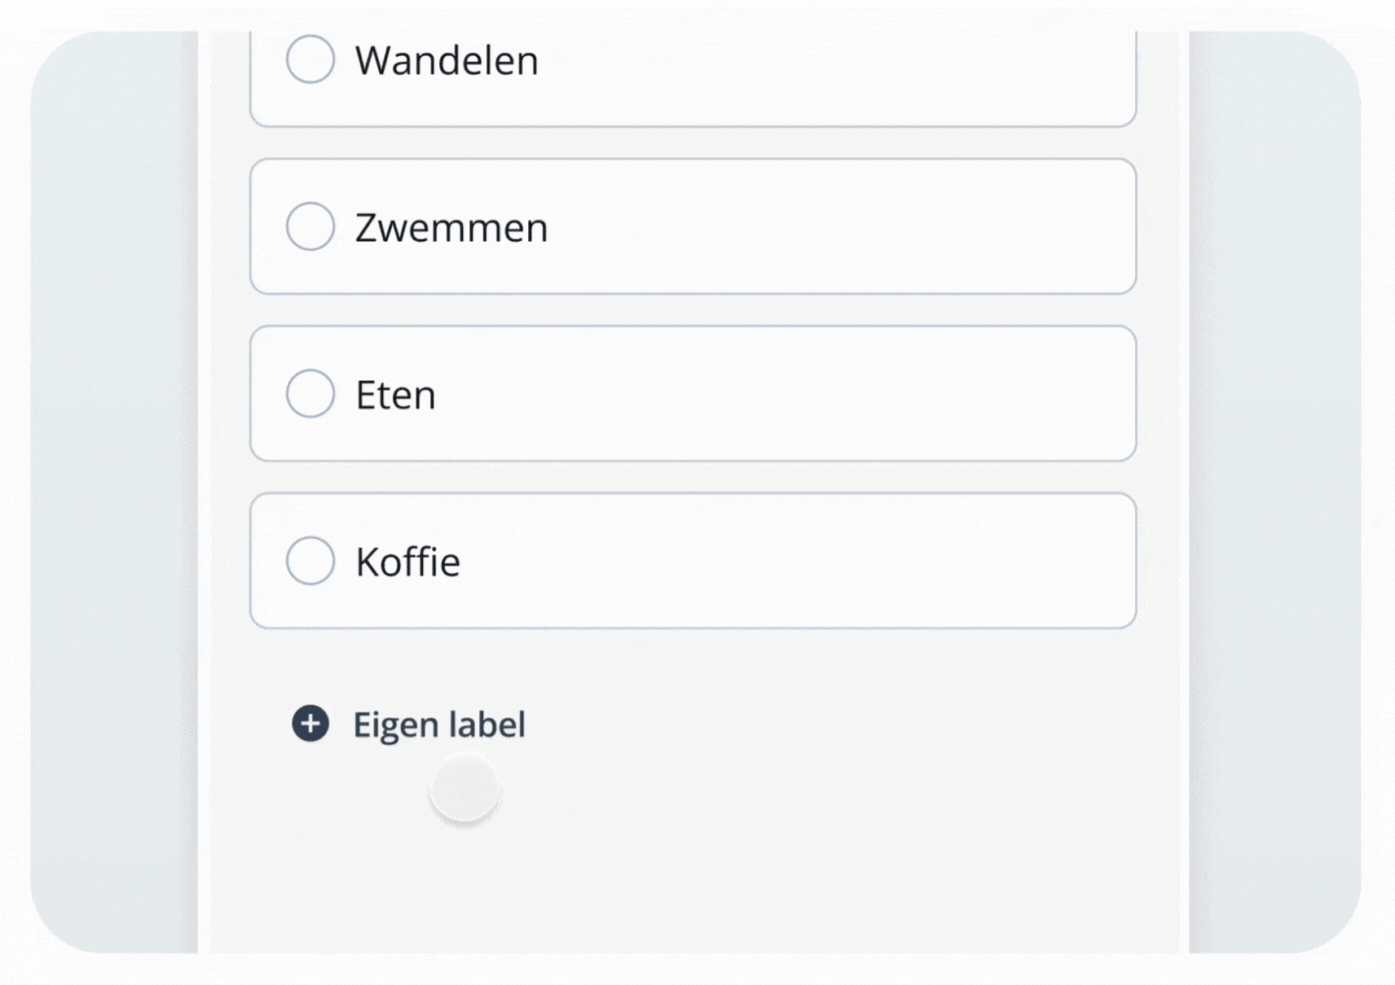 |
4 | After choosing the date, time, and label, click on ‘Add label’ to save it. 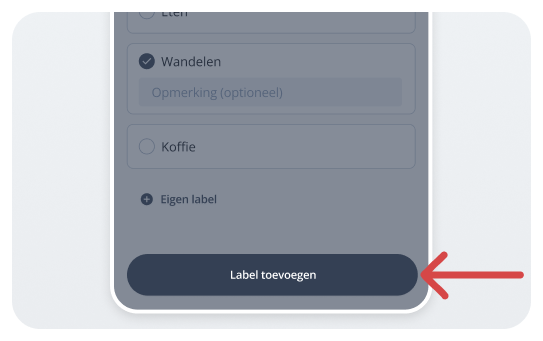 |
Stopping the Measurement
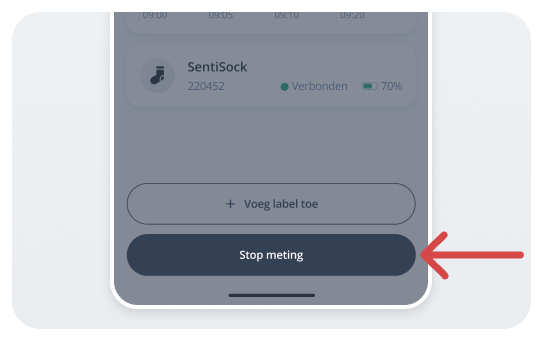
1 | Open the HUME app on the Hub phone and press ‘Stop measurement’. |
 | |
2 | Disconnect the Senti-module from the sock. |
3 | Put only the sock in the supplied HUME laundry bag. |
4 | Charge the Senti-module and the Hub phone. |